Motivation#
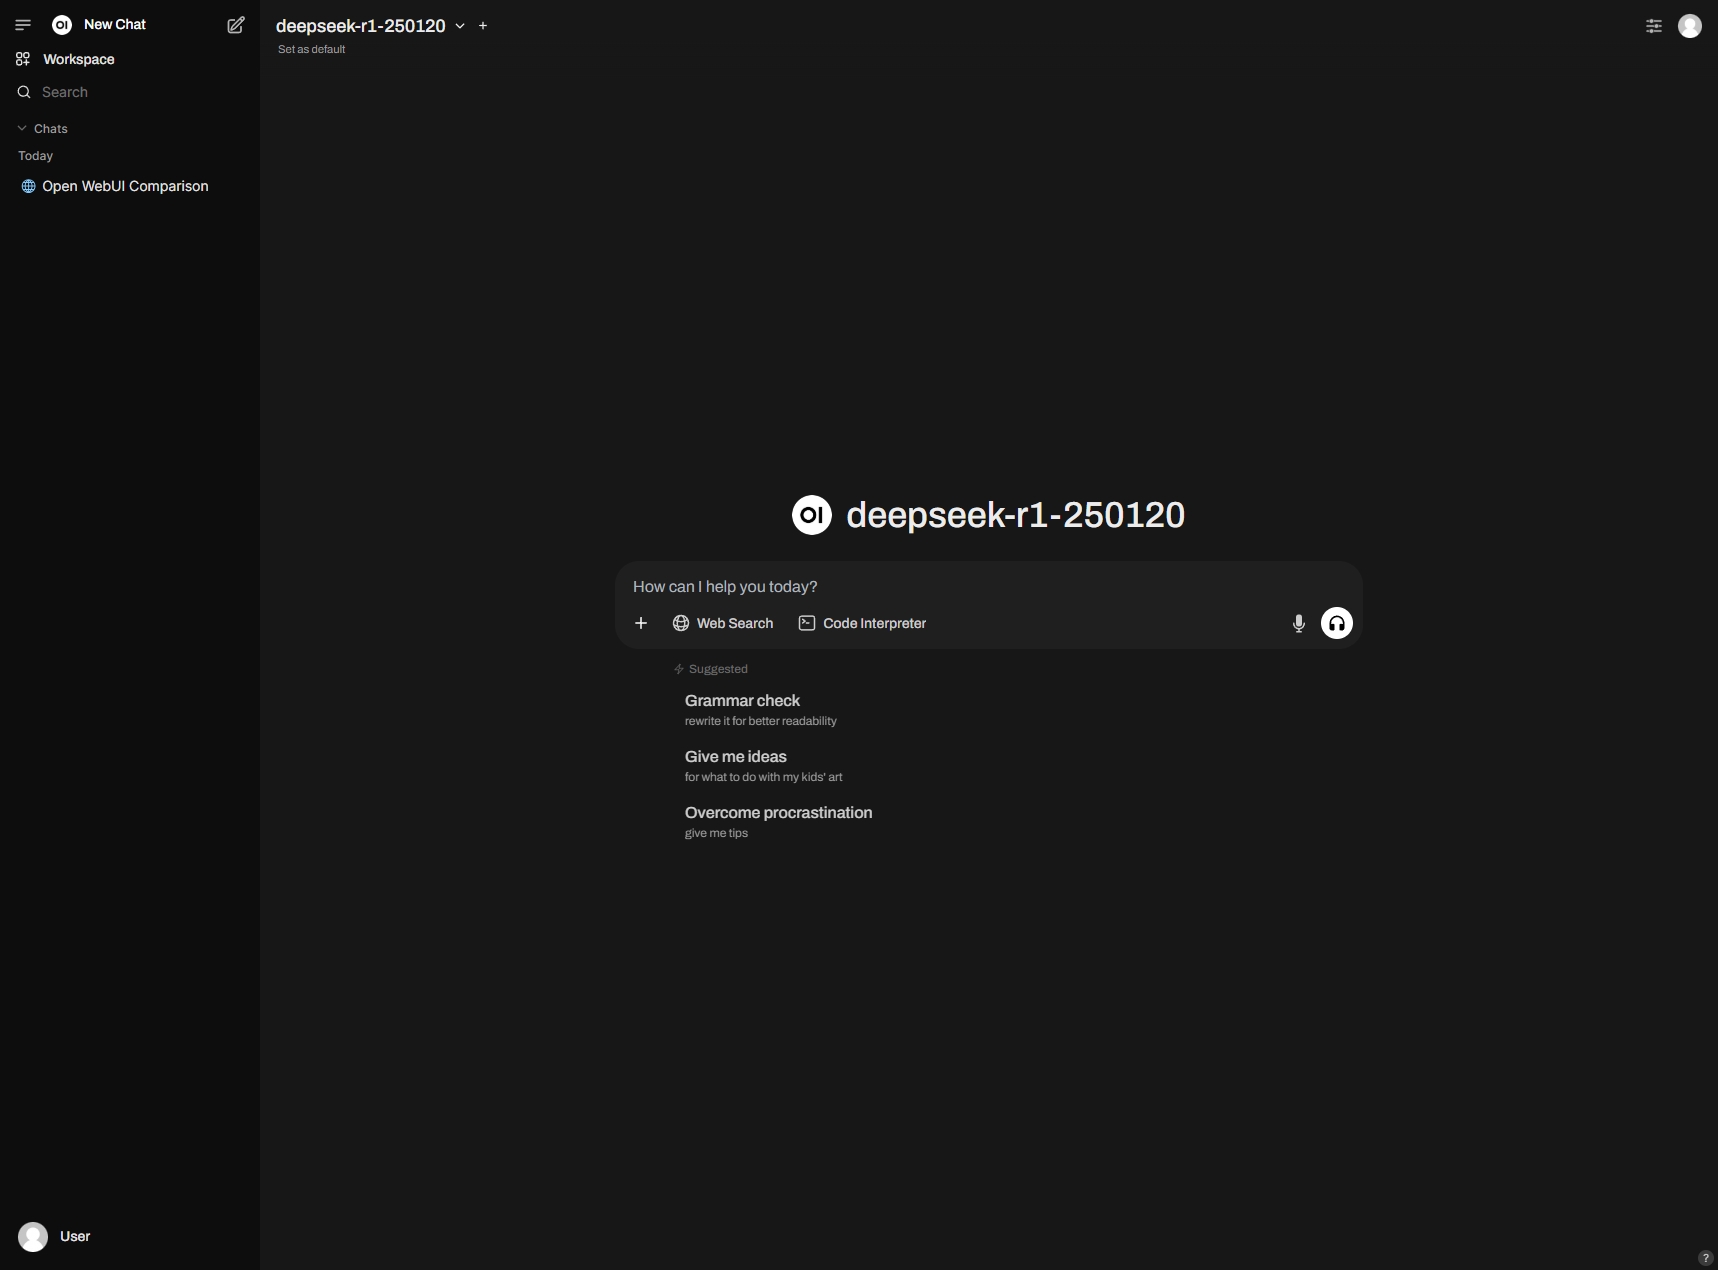
DeepSeek R1 has been my favorite LLM since its release. However, due to the explosive growth in its user base and usage, its official chat service has become quite unstable, frequently displaying messages like “The server is busy. Please try again later.” Upon a friend’s recommendation, I decided to explore using third-party DeepSeek APIs—preferably with the flexibility to switch between different LLMs or even use locally deployed ones. Open WebUI has perfectly met these requirements while also supporting plugins to extend its functionality.
Furthermore, since I frequently switch between multiple computers, running and maintaining individual Open WebUI instances on each device is impractical—not to mention the lack of chat history synchronization. Given my existing Home Lab setup, I decided to deploy Open WebUI on my Kubernetes cluster and securely access it via Cloudflare Tunnels.
Installation#
Create a separate namespace for Open WebUI
1
2
3
4
| apiVersion: v1
kind: Namespace
metadata:
name: open-webui
|
Leverage Metallb to create a load balancer for it. Within the home network, I can access it at http://<LB-IP>:8080 or I can assign a local domain name for it like ai.home with Pi-hole
 1
 2
 3
 4
 5
 6
 7
 8
 9
10
11
12
13
14
15
| apiVersion: v1
kind: Service
metadata:
name: open-webui-tcp
namespace: open-webui
spec:
type: LoadBalancer
loadBalancerIP: <LB-IP>
ports:
- name: web-ui
protocol: TCP
port: 8080
targetPort: 8080
selector:
app: open-webui
|
Create a PersistentVolume on the NFS server for Open WebUI DB, cache, uploads etc.
 1
 2
 3
 4
 5
 6
 7
 8
 9
10
11
12
13
14
15
16
17
18
| apiVersion: v1
kind: PersistentVolume
metadata:
name: nfs-pv-open-webui
spec:
capacity:
storage: 10Gi
volumeMode: Filesystem
accessModes:
- ReadWriteMany
persistentVolumeReclaimPolicy: Retain
storageClassName: slow
mountOptions:
- hard
- nfsvers=4.1
nfs:
path: /nfs/export/open-webui
server: <NFS-server-IP>
|
Create a PersistentVolumeClaim for the pod
 1
 2
 3
 4
 5
 6
 7
 8
 9
10
11
12
13
| apiVersion: v1
kind: PersistentVolumeClaim
metadata:
name: open-webui-pvc
namespace: open-webui
spec:
accessModes:
- ReadWriteMany
volumeMode: Filesystem
resources:
requests:
storage: 1Gi
storageClassName: slow
|
Finally, create the Deployment
 1
 2
 3
 4
 5
 6
 7
 8
 9
10
11
12
13
14
15
16
17
18
19
20
21
22
23
24
25
26
27
28
29
30
31
32
33
34
35
36
37
38
39
40
41
42
43
44
45
46
47
48
49
50
51
52
53
54
55
56
57
58
59
60
61
62
63
64
65
66
| apiVersion: apps/v1
kind: Deployment
metadata:
name: open-webui
namespace: open-webui
spec:
selector:
matchLabels:
app: open-webui
replicas: 1
strategy:
type: RollingUpdate
rollingUpdate:
maxSurge: 1
maxUnavailable: 0
template:
metadata:
labels:
app: open-webui
spec:
containers:
- name: open-webui
image: ghcr.io/open-webui/open-webui:v0.5.16
imagePullPolicy: IfNotPresent
env:
- name: WEBUI_AUTH
value: "False" # no need to login to Open WebUI
- name: ENABLE_RAG_WEB_SEARCH
value: "True"
ports:
- containerPort: 8080
name: web-ui
resources:
limits:
cpu: 2
memory: 3Gi
requests:
cpu: 1
memory: 1Gi
livenessProbe:
httpGet:
scheme: HTTP
path: /health
port: web-ui
initialDelaySeconds: 180
periodSeconds: 10
timeoutSeconds: 5
successThreshold: 1
failureThreshold: 3
readinessProbe:
httpGet:
scheme: HTTP
path: /
port: web-ui
initialDelaySeconds: 30
periodSeconds: 10
timeoutSeconds: 5
successThreshold: 1
failureThreshold: 3
volumeMounts:
- name: data
mountPath: /app/backend/data
volumes:
- name: data
persistentVolumeClaim:
claimName: open-webui-pvc
|
That’s it.
NetworkChuck provided a pretty concise video guidance on how to setup Cloudflare Tunnels so you could securely access services in your home network. I already have cloudflared installed, thus just need to add one more public hostname:
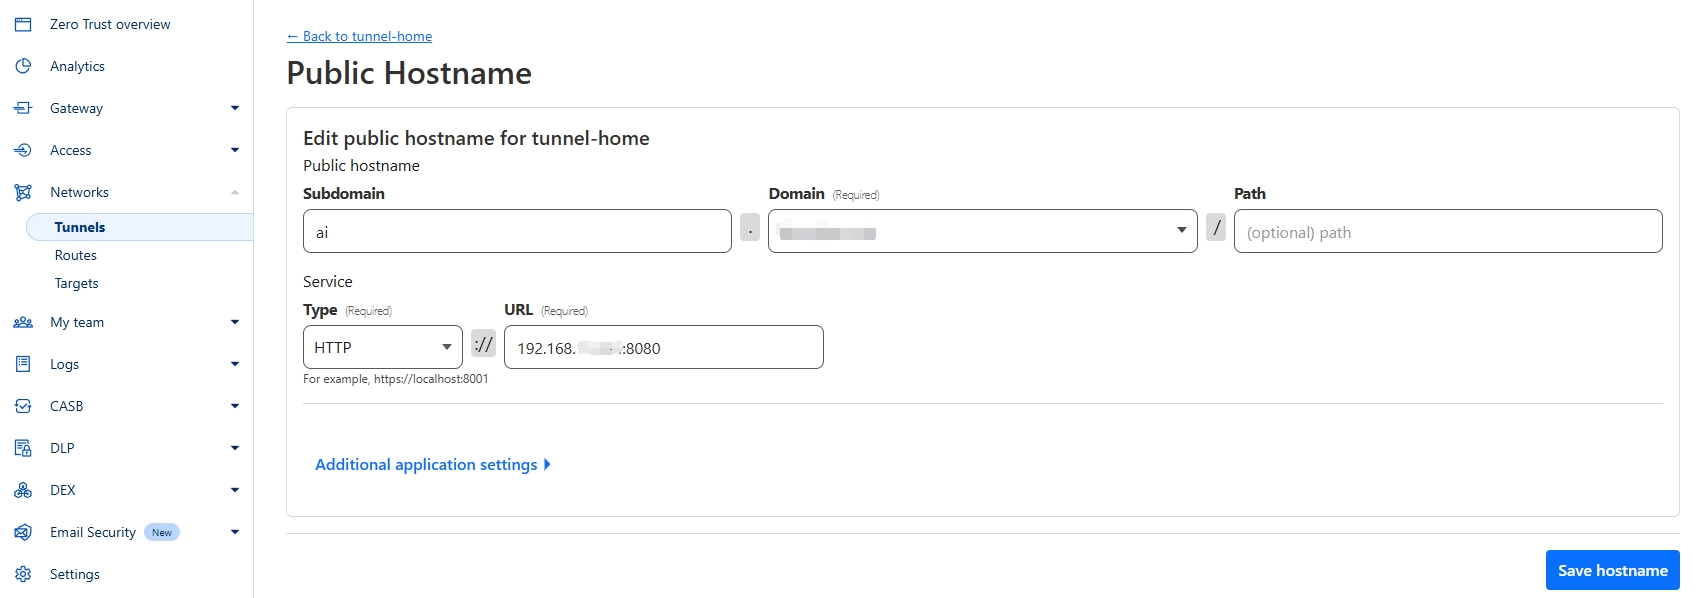
And now I can access my “stable” DeepSeek (or other LLM) from anywhere!